I'm very proud of my nephews both are awesome at both baseball and basketball. My oldest nephew is playing in a tournament with his high school team. Last year he even got to play on the freshman team as an eighth grader. My sister gave me some pictures of that time so I wanted to scrap some. Here is one of my pages. The page is a little hard to see, but I distressed it with some creamy caramel to make it look like a baseball that had been used a bit. The colors are white, Brilliant blue and black. The letters are the Varsity Alphabet stamped and then cut out and adhered to black and brilliant blue cardstock. Each picture is matted with both colors too. The ball is cut out with the circle scissors and then laces are drawn on with black marker. I thought it was a fun, but subtle page.
What do you think? Do you like it?
I hope you have an awesome day and if there is someone you want to encourage I hope you can take time to tell them or share with them in some way how much you appreciate them or even how much you are proud of them like I am of my nephews.
Tuesday, March 31, 2009
Sunday, March 29, 2009
decor stencils
Did you know or realize that SU has stencils that coordinate with their stamp sets?
I saw a training video on SU's website and had to try it. The stencils can be used on walls, decorative items, even cards and scrapbook pages. I had fun playing with it yesterday. Experimenting with different colors and techniques and shading.
This one is embossed on Chocolate Chip paper with clear embossing ink (that why it looks shiny in spots). I didn't want to take away too much from the stenciling so I thought I would just keep it a simple card this time. I stamped For You which is from the Great Friend set coming out in the new mini on April 1st, on vanilla paper. Then I punched it with our designer label punch and used our silver hodgepodge hardware to hold it all in place. It was quicker then I thought and fun too. So what do you think
Friday, March 27, 2009
Sale-a-bration ends in 4 days
This is just a friendly reminder that Sale-a-bration ends in 4 days (March 31st). If you are new Sale-a-bration is when you spend $50 in SU product (before shipping and tax) you get to chose one item from the Sale-a-bration brochure for free (there are 4 stamp sets, a ribbon bundle and a paper pack to chose from). It's not to late if you are still interested. You can contact me or go to my SU site http://detailmama.stampinup.net.
The other incentive right now during Sale-a-braton is the new recruit incentive. If you ever thought about being a demonstrator now is a great time. The starter kit, which is already a good deal, is on sale plus you get an extra free stamp set from the catalog. Let me know if you are interested in this opportunity as time is running out.
Wednesday, March 25, 2009
celebrate - pop up card
Sorry, I don't have anything really new to show you at the moment. If you've been to some of my classes you've seen this one displayed. I spent the weekend working on my bible study / scrap book class and then I spent half of yesterday it seemed at the hospital as my husband was sick (better today - yeah) and today I had to get off work early to gather kids and help my DD with her project due this week that she is behind on. We realized we didn't have magnets for her idea so we had to go to the store and get them. Anyways, with all that going on I haven't had much time to create unfortunately.
Anyways, this is another card that sort of pops out or up when you open it. I did one for valentines day, but this one is a birthday card with stars instead of hearts. It's fun to create, but this one takes a little bit more time to do. It's several layers with the rolled image, punched out shapes, and stamping. Not to mention making the pop up section, which isn't real long, but does take some time. I could have added more items too. The hard part is deciding when to stop. :)
So I hope you like this one.
Here is what I use for it.
Stamps: A little birthday cheer, Celebrate Everything
Inks: black, So Saffron
papers: real red, black, saffron, whisper white
Accessories: Large and small star punch, 1 3/4" circle punch, glue dots, dimensionals, roller and star roller stamp.
Thanks for looking
Monday, March 23, 2009
scrapbooking your faith - God's Beauty
Tonight I tried something that has been tugging on me a little while to do. I started a trial scrapbooking your faith / bible study class. I felt like I should do this for two reasons. One I scrapbook important events or people, but I don't take time to scrapbook something very important to me which is my faith and how it shapes me. Secondly, I wanted to start thinking about something positive. With the economy or all the negative news on the air I wanted to do something that was uplifting and inspiring (at least I hope.) So tonight we had our first class. We scrapbooked these two pages and then had a prayer and bible study time. I had a great group of ladies come and listen to me share my thoughts. We discussed Psalm 27 where "God offers help for today and hope for the future" (theme listing from my bible). If you get a chance you ought to check it out. It talks about how we shouldn't fear even when things are against us, that we should seek God's beauty, that He will not forsake us and how we should wait upon the Lord. I especially liked a note in my bible that also refers to Lamentations 3:24-26 which calls for us to "hope in and wait for the Lord because often God uses waiting to refresh, renew and teach us" (Life Application notes). If we seek His Beauty and presence and wait on His will we will be truly blessed.
I hope you take a moment and reflect on God's beauty and what that means to you.
If you are blessed, then share your joy with others this week. Shout your joy and share in your blessings. God bless and have a great day today.
I hope you take a moment and reflect on God's beauty and what that means to you.
If you are blessed, then share your joy with others this week. Shout your joy and share in your blessings. God bless and have a great day today.
Easter card - lift up
Hi everyone,
Sorry I haven't had as many new items to post. I've been working on my scrapbooking your faith / bible study class, so I didn't get the same creative time to make stuff that I normally do over the weekends. That and taxes, which are always fun in this household and I'm still not finished yet.
Oh, well, I wanted to show you all this card. This is one we did at club. This is a card that I learned how to create from SU's monthly magazine that they send out to their demonstrators. On this card the front flap lifts up to show your sentiment. Here it says Eggstra Special Easter wishes from the Loads of Love accessories. The bunny is from one of the new sets in the mini that you can order now ahead of time and is colored in with markers. The top papers are from the free pack from Sale-a-bration. This is a reminder too that Sale-a-bration ends in a week. If you'd like to still order to get free items there is still time. You can order through my online site http://detailmama.stampinup.net or email me.
So what do you think? It's a fairly easy and fun card.
Hope you enjoy it and have a great day.
Saturday, March 21, 2009
Manhattan Flower textured impression die
This is our new Manhattan Flower textured impression die that goes along with the big Shot. Isn't it gorgeous! It's so simple too. You just put your top part of your card in and run through the Big Shot and there you go. I did run a dauber with a tad of ink over it, but not much. It's beautiful all by itself. This came available this month, so if you have the Big Shot this makes a great quick beautiful card.
I also used the new organza ribbon. It's great too and looks great with this card. I used Sincere Salutations and stamped thinking of you and then punched out with the wide oval on the pink card. It's popped up with dimensionals.
(the grayish tones in this picture are shadows. They aren't part of the card. Sorry about the poor photography.)
This Lovely Lilac card is made the same way. Except I stamped this one with Happy Birthday from the On your Birthday stamp set and punched out using the large oval. Then I bordered it with - guess what - a new punch coming April 1st. It's a scallop oval punch. It will be in the mini catalog along with a coordinating stamp set. Too cool.
I gave this one to a friend of mine for her birthday. It's a little blurry, but it's the best picture I have. Thanks for looking today.
I hope you have a great day.
Friday, March 20, 2009
top note gift card holder club project
One of the items we made at club was this gift card holder made using the Top Note die for the Big Shot. I see that I didn't take a picture of it in the pocket, but the little card actually slides into the side of the Top Note card and the ribbon tab sticks out for easy removal. It's hard to see but I used the slit punch to punch holes into the insert card to hold the gift card. The gift card will either cover up the Happy Birthday so they see it when they pull it off or that can be the back side, so there is options. I stamped the back side of mine too. so it's flexible and pretty too.
The words are embossed so they stand out. This could also be modified for other occasions too. Just change the wording on the front of the insert. It could be thank you, Mother's day, just for you, etc.
Thanks for looking
The words are embossed so they stand out. This could also be modified for other occasions too. Just change the wording on the front of the insert. It could be thank you, Mother's day, just for you, etc.
Thanks for looking
Wednesday, March 18, 2009
Sneak peek - 3d ball
If you haven't seen the Big Shot, it's a pretty cool tool. Right now is a great time to get the Big Shot as Sale-a-bration is going on. With the Big Shot and a die you would qualify for two free Sale-a-bration items and if you chose the kit you would get even more, plus hostess benefits. Not to mention if you'd like more dies you could easily qualify for hostess benefits that way too as well as more sale-a-bration sets.
Anyways, I'm enjoying my Big Shot and have used it a whole lot.
Coming in April you can purchase two 3D dies to go with it. This pop up ball die (it will lie flat and then pops up) and a pop up cake die (it folds flat in a card and then pops up to form a whole cake when opened.)
I was able to pre-order them and I picked this one. I thought it could be used several ways. In a scrapbook, on my desk as an ornament, in a card, as a calendar, etc. I did a quick sample before club and I made one with Upward pics of my kids and put '09 on the top with our new Varsity numbers. The uniforms were green so I picked garden green to make the ball. Sorry, but I forgot to take a picture of it squashed down.
For the simplicity and speed that I created it I thought it turned out pretty cool. It's a little tricky to put together, but it went faster then I thought it would and the directions were good (except I don't think the directions said what size rubber band to get). The good thing about being a demo though is that SU provides us with training videos and there they told us what size to use and also provided us with a template to use for cuting out the pictures. It's fun being a demo getting to preview stuff and getting to see the ideas and training. If you ever thought about doing it there are special incentives during Sale-a-bration which ends March 31st. Let me know if you are interested.
6x6 or a card
This posting shows how you can take the same idea or and make either a card or a 6x6 scrapbook page using pretty much the same materials (on the inside of the card you have white which is hiding here). I know some of you like to scrap and some like to make cards and some both. So here is an idea on how you can take the ideas we use and modify them either way. Cards can be used as scrapbook elements or ideas and vice versa.
This is a theme similar to the one we did at the kid's stamp a stack. It uses the masking with the rollers and the star punches.
It was fairly easy to accomplish, but I think makes a fun card or page.
So next time you get a card or a scrapbook page, look at it a little differently and see how you can modify your items to fit your needs. It is sometimes fairly easy and takes minimum changes. Hope you enjoy this and have a great day.
Here is what I used.
papers: real red, basic black, whisper white
ink: white, black
stamps: a little birthday cheer (for card)
accessories: big and little star punches, roller handle and whimsy roller, gel pen, Big shot and GoGo alpha die (scrap page numbers), heat gun and white embossing powder (for words on card).
Monday, March 16, 2009
St. Patty's day
Tomorrow is Saint Patrick's day. It's also my daughter's 10th birthday and she is excited. I hope she has an awesome day. (Happy Birthday, Sweetie!). Yes, she checks out my blog too, so I had to say that.
So anyways I was playing around with my sale-a-bration set and came up with this design. I had seen some hearts used something like this before, so I modified it to use the Polka dot punches set to celebrate St. Patty's day. I also thought it would be good for anything you just want to say good luck for - new job, new date, etc. You could also switch this to a birthday or thinking of you greeting - any of these would work.
I made this by stamping the heart in Handsome Hunter on Garden green paper. I stamped good luck on white and inked the edges and punched out with the wide oval punch and then popped up with dimensionals. The stem is made using the oval punch. I punched once and then shifted my punch over slightly and punched again, making this little stem. I then layered this on celery and garden green paper on top of a white base. It took a bit to stamp and punch all these out, but I thought they turned out pretty cute. I ended up giving these to my club members. I hope they liked them.
Sunday, March 15, 2009
More Fifth avenue
Can you tell I like this set? To me it's really versatile.
Here is a card I created to prepare for a workshop, but I decided to add a little more, so I created the next example and added a few elements. Both cards are nice. The first being more clean and simple and the second having a little more punch to it. I like them both, but I thought you might like seeing how just a few extras make a difference.
So feel free to experiment with your cards and scrap pages to see what you can come up with. Actually it's kind of fun if you get the time.
The top card uses the following elements:
Paper: bashful blue, night of navy, whisper white
ink: night of navy, bashful blue, almost amethyst
stamps: fifth avenue and thank you kindly
accessories: wide oval punch and dimensionals, sponge dauber.
The second card is uses most of the same items of the first card except I added the following
inks: night of navy craft (I embossed the words)
accessories: night of navy grosgrain ribbon, eyelet border punch, clear embossing powder and heat gun.
So take time and experiment and have fun with your creations. It really is fun.
Decor Element video on my SU site
If you would like to see a quick video using the Decor Elements go to my SU site http://detailmama.stampinup.net. Here you will see Jaron Winder demonstrate how to use them as well as a couple of different uses for your decor elements (think bathroom). It was interesting to watch anyways and it might inspire you to try something new.
Saturday, March 14, 2009
flower fancy - clean and simple
I know I like to color a lot and I sometime spend a lot of time on one card, but every once in a while I try and make what they call a clean and simple card(CAS). It's hard for me, because I keep wanting to add to it, but I played around with this one and this is what I came up with.
I demonstrated this card at a workshop just recently. Every now and then I like a quick and easy card, so I showed this one.
This one uses the Flower Fancy stamp set and Really Retro words.
The flower Fancy stamp set is a two step set. I stamped the solid color in Lavender lace and the outline in Elegant Eggplant, so no coloring just stamping. I also stamped the words in Eggplant too. I used Eggplant and lavender paper and whisper white as my base. I used white grosgrain ribbon and I edged the eggplant paper with the scallop border punch. It's hard to see but I also pierced holes in the middle of each scallop to give it some detail.
So what do you think? Do you like a simple one every now and then?
Friday, March 13, 2009
Big shot butterfly
I'm really liking the Big Shot if you can't tell by now. Now is the best time to buy it too (or any bigger item really). The machine alone almost qualifies for 2 Sale-a-Bration sets. Add in a few dies and you get those, as well as the fact, that you are almost at hostess benefits. So you'd get the machine and some dies or other accessory, you'd get at least 2 Sale-a-bration sets if not more and if you either buy enough or get some outside orders it wouldn't take you any time to reach hostess benefits.
Just a thought anyways. Sale-a-Bration ends on March 31st. You can order through me or at my online store at http://detailmama.stampinup.net
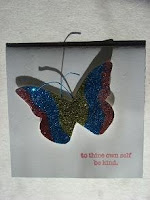
So anyways, back to the little notecard card and why I like the Big Shot. Well for one thing the bigger dies like the butterfly can cut through something like 50 different types of materials and maybe even more. For this card I cut through both cardstock and a piece of the Sticky pages (kind of like sticky strip but in page size.) I then used my hobby blade and cut away pieces of my sticky page and added new fine glitter to each section. Use your embossing buddy on the tape cover as it is clingy. I then just cut out small strips of cardstock and then curled them slightly to make the antennae. Then I stamped the sentiment. It was pretty simple to make overall, just get use to glitter on stuff. Although the glitter doesn't flake off the butterfly much like it normally does. I have to say the sticky page is cool for that as long as you take care of the static.
Hope you all are having a great day and have enjoyed seeing more projects made with the big shot as well as other fun products too.
New information about starter kit
Here is some information about the starter kit that just came out. From now until April 30th, SU is allowing for a 3 easy payment plan on the basic starter kit. It's a trial to see how customers like it. If you ever thought about being a demonstrator now is a good time to join. You have to decide soon though, because the payment plan option has to be mailed in. To get the discount price it has to be in their office on or before March 31. After that the price returns to normal, but the 3 payment plan is valid until April 30th (in their office). So if you considered this, but can't afford the whole cost up front talk to me about the three payment plan.
The starter kits by themselves are a great savings on the various supplies. Just add up the stuff for yourself and see. Then you add 15% off during Sale-a-bration, plus a free stamp set from the catalog on top of that and it's an even better deal. If you are just starting and needing supplies this is a great way to get started. Then as long as you are active you get discounts on your stuff, you get to be the first to see and get product, and right now there are added benefits in honor of SU's 20th anniversary. The only thing you have to do to stay active is to have $300 in sales a quarter. If you are addicted like I am and have a super long list or if you like to share all about the great products they have, it doesn't take much to reach that level.
You can chose how to run this business too. It's flexible based on your schedule. You can also just do it as a hobby to help support your habit and get discounts or you can work it like a business and eventually earn income. It's all up to you. So if you are interested in starting something like this and sharing your love for stamping / scrapbooking with your friends, let me know and the sooner the better for the best deal as the 15% off and free extra stamp set ends on March 31st.
Oh, another note with the starter kit, just so you know. You can substitute most all the consumable product goods (stamp sets, ink, paper, etc.) within limits. Like you can change ink colors or you can change stamps, but it needs to be that dollar level or less (i.e no craft for classic ink since they cost more or you can't pick another stamp higher then that value) Hope this makes sense. Let me know if you have questions. Thanks.
Tuesday, March 10, 2009
botanical blooms
One of the perks of being a demonstrator is getting to see different ideas. This was an idea that SU shared with us demonstrators in their monthly magazine. I liked it so much I had to make it. I demoed this at a workshop recently. It was fun and pretty easy to make.
If ever you thought about being a demo, now is really the best time to join. Whether you want to make some extra money or you would like to become a hobbiest and get a discount and first dibs on all the new products the special is nice right now. Not only is the starter kit on discount, but you also get to chose a free stamp set on top of that of your choice in addition to the kit. It's all part of Sale-a-bration which ends March 31st. If you have any interest in joining let me know. I can tell you all about it.
Here is what I used to make this card:
paper: riding hood red, chocolate chip, pink pirouette, kiwi kiss and whisper white
ink: chocolate chip, riding hood red, basic black, going gray
stamps: botanical blooms, congrats
accessories: aquapainter, piercer, mat pack, tafeta ribbon, new border punch, dimensionals
Monday, March 9, 2009
jumbo wheel - friends
Here is a card I demonstrated at a recent workshop. It was a fun project. I just had to make sure I wheeled in the right direction. Can you tell I did that a couple of times? I inked the wheel using the old olive Jumbo wheel cartridge. Then I used my Chocolate chip marker and colored in friends with it. I then added some chocolate ribbon at the top. I used the Big Shot and made a butterfly using the Urban Garden DSP. I used the word window punch to make a body and snipped the ends to make a tail of an old olive piece of cardstock. I layered the white on Not quite navy paper and then layered that on Old Olive. It's really rich looking in real life. I like these colors together. It was fun to use a wheel again.
Sunday, March 8, 2009
basketball thank yous
I wanted to give a thank you card to my kid's Upward Coaches. I was trying to figure out a different type of card and this is what I came up with. It would make a good birthday card for a basketball lover too. I also thought this idea would make a fun scrapbook page addition too as I always take a ton of pictures and also have family that play too.
It's hard to see from the front, so I included a side view. I added a cut circle behind the ball to help make it bounce when you hold it.
So here is how I made the card. I ran the paper through my Big Shot using the textured plates. Then I used my new circle scissors to cut it into a circle. I then took a sponge and some pumpkin pie ink and ran the sponge over the dots to help make them stand out. I then took a basic black marker and drew lines for the ball. I also drew lines on the paper like it was flying through the air. I then stamped Thanks a gazillion in basic black. I attached the ball by cutting a 1 3/4" circle and cut it in a spiral. I attached one end to the ball and one to the card. It makes it wiggle when I move it.
See the side view.
So I hope you like my experiment.
It was fun to play anyways.
Hope you all are enjoying the nicer weather.
Have a great day.
Saturday, March 7, 2009
fifth avenue floral
First off I want to apologize for not posting hardly anything this week. The illnesses in our household took a toll on all of us. We were tired every night and I just didn't have the energy to create. Sorry about that.
Secondly, I'm loving this Fifth Avenue Floral stamp set. You will probably see several samples made with it. I love it. I like how I can color it in if I want or I can leave it plain. It's easy to cut out and it's easy to layer. You can also add little touches of glitter and give it some glittery highlights. It's really a fun set.
I hope you enjoy this card and have a great day, especially since it's warming up and the sun is shining.
For this card I used the following:
Papers: Rose red, basic black, whisper white
ink: rose red, basic black
stamps: Fifth avenue floral, thank you kindly
accessories: rose red grosgrain ribbon, wide oval punch, dimensionals, daubers
Monday, March 2, 2009
mini update
Click here to see the three new sets you can now order from the new mini early. There are 3 Easter sets and one roller in the mini that you can now buy. That way you can get them in time for Easter.
Eight Great Greetings is $27.95
An Eggcellent Easter is $21.95
Egghunt (roller) is $6.50
Wagon Full of Fun is $34.95.
These will still be in the mini, but it just allows you a chance to get them before Easter. The rest of the mini as well as some new Sizzix 3D dies will be available in April.
There will also be a new promotion for April - The Get Connected Campaign. For every $40 you spend in the mini catalog or for a $150 party you can pick one item from the "Under $10" page in the Spring-Summer 2009 Idea Book & Catalog for free. Pretty cool. I ordered my customer's minis this past weekend. Hopefully you should get them soon.
Let me know if you are interested in any Easter sets. These can apply toward your totals for Sale-a-bration too. Sale-a-bration ends March 31st, so if you want any of the free items now is the time to order. On a side note: be careful ordering online. It's very easy to miss the click here button to add Sale-a-bration sets to your order. Make sure you order those before you finalize. It appears to not prompt you other then the click here button near the bottom of the page changes. Hope this helps and have a great day.
Subscribe to:
Posts (Atom)