Tuesday, May 31, 2011

masculine guitar birthday card

This is a card that was made for a someone that likes to play games like
Guitar hero. I thought this stamp and card idea was great for the person it was made for. It's hard to see the detail of this card, but it is shiny and sparkles some. The lighting wasn't very good the night that I took the picture. Sorry I don't have a better picture. The guitarist is actually cut out and popped up with dimensionals. I used the edges of the dimensionals to pop up the smaller areas. I hate to waste stuff, so I use even the smallest of scraps when I can.
It is stamped twice. That way I didn't have to cut out the cords and small details, just the main character. It also gave it more of a 3d type of effect which was cool. The star is also popped up as well as the saying. I used the seam binding ribbon and the Word Window and Modern label punches. The background is just the brayer bounced around with various colors.
It's somewhat a basic card, but it fit the need and they enjoyed the card.
The inside has stars popped up on it too as well as another saying. Sorry I forgot to photograph the inside. I hope it gives you an idea for a masculine card next time you need one. Hope you have a great day today.

Saturday, May 21, 2011

wedding shower card

We know several people getting married in the next couple of months. Most all of our friends went from getting married to having children, so there weren't too many weddings for a while, but several baby showers.

One of our friends had a shower recently and this is the card I made her. It was at a busy time, so I wanted a simple but elegant card.
I used the Elegant lines embossing folder and embossed some whisper white paper. I then took a dauber and my frost white shimmer paint and daubed all the raised areas which created a shimmer effect on the raised area (if you look really close you can see it). I then tied some organza ribbon around it creating a tone on tone look. I wanted a little pop, so I punched a scallop oval out of Basic black. I then stamped Congratulations with my black and then punched it out with the large oval punch. I raised the saying up with Dimensionals for added pop.

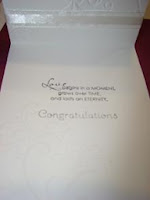
On the inside I added a saying and Congratulations in the same basic black. The cool thing with the clear mount is that I put both of these on my block at once, lined them up and stamped. Pretty cool. I decided I needed a little something else so I took the large flower from the wedding sweet set and stamped it subtly in the lower left corner. If you look really close you can see it. Sorry it was the best picture I could get at the time. It is there though. I think it's fun to add little touches to the inside or the envelopes to make the cards even more special.

Hope you enjoy my share today. Blessings. Lisa

Wednesday, May 18, 2011

mothers day card and new mini set

Hi everyone,
Sorry its been so long. Life just gets somewhat crazy at times. I haven't had as much time to create lately, but have created items for my classes and when I need items. Just need to pick out time to document them and download them all. We have had a busy few weeks being active in several things. We've had church activities, after school activities, field hockey, etc. Seems like some days we meet ourselves coming and going. I'm sure some of you can relate. I'm hoping summer brings somewhat a reprieve although, it's starting to look somewhat busy already. So I've made a few cards outside of my class time cards and this is one of them. This was my Mother's Day card for my mother. This new set is in the new mini that's out. It's called Fabulous Florets and I just love this set. I've already used it in several colors even. This one uses Rose Red and Pretty in Pink (I hope you can see the stamped flowers). I added some Pear seam binding that is being rolled over and can still be purchased. I did cut out layers of the flower. I basically stamped it 3 times, cut out each one making it smaller each time. I added dimensionals between the layers to give it a pop. Made it look really pretty and 3 dimensional. It was overall an easy card, but thought it made for a pretty Mother's day card. Even though that holiday is over, I think it would still be pretty for birthday, showers, thinking of you, etc type of cards. You wouldn't even have to add the layers, I just did that to mine just because I wanted too.
I've also been working on a digital album idea too that I hope to have done soon. There is a sale going on in May for printing those. So I've been spending extra time doing that too. I'll have to remember to post some pages when I'm done with it. It's all about a trip we took in April to South Carolina with Boyscouts. So anyways, I hope you enjoy my card today and I hope you continue to create. Blessings. Lisa