Wednesday, April 28, 2010

Wonderful husband card

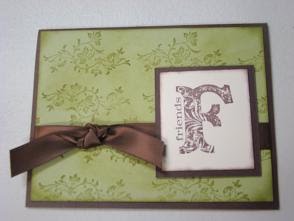
Here is one of the cards I played around with this weekend. This picture looks darker then in real life though. Sorry, it was dark outside when I took it. We've had a lot of overcast days lately when I've been home, so I just went ahead and took the picture.

I just wanted a quick and easy idea for a masculine card. I used my Wonderful favorites stamp set and my star punches to make this card. The wonderful is stamped in olive and husband is stamped in chocolate craft and heat embossed to raise it up. I added the chocolate grosgrain ribbon and popped some of the stars up and it made for a cool little card I think. Some days I like quick and easy for my schedule. Especially lately.
I think it's nice just to tell someone that you care from time to time or how much they mean to you. So I challenge you to share with someone you really care about how much they mean to you, whether it be by card, small gift, phone call or visit.
Well, I hope you enjoy my share today. I also hope you have a great day today.

Tuesday, April 27, 2010

masculine cards

I'm not sure why, but this weekend I got on a kick of masculine cards using the Wanted set and a couple others. I thought this one was interesting because it looked a little like the old fashioned wanted type posters - well a little anyways. I took vanilla paper, tore the edges inked with Chocolate chip and Soft suede and rolled some pieces with my fingers. I have to tell you that I haven't used soft suede a lot, but when it comes to distressing things it's a color I'm really liking, especially on the vanilla. I also liked the wood grain stamp on the back of the base card too. It almost looks like it's on a tree. The word Wanted and the circles are from the Wanted stamp set. The words are from Wonderful favorites. I placed silver brads in the circles for dimension and I also stamped the words on separate pieces too to add some extra dimension, but they could have been directly on the paper for a clean and simple (CAS) card effect.
I also took a picture of the Wanted sign without the extras as I thought that would also make a cool journal spot on a scrapbook page. Either one would really, but this one was more open for journaling.
So I hope you enjoy my shares today. I'm not the best at masculine cards, but had fun this weekend making some.
Have a great day today.

Wednesday, April 21, 2010

another simple scrap page

Here is another simple combo scrap page. This one uses the cottage wall dsp. I also used the just perfect stamp set and my Big shot and daisy die. I kept the design simple and wanted to add several pictures with some simple matting. Like I said it had been so long since I got to scrap some that I was trying more for cute and quick. So that is what I did. I also took limited supplies, so I only ended up with only so much to work with, which is interesting for me as I'm use to being able to pull from like my about ten year stash. I don't remember when I started buying SU, but I know it's been quite a few years ago and I still love the stuff. The paper of course is Rich Razzleberry and I chose Turquoise mats and the green dsp to match the colors in the dresses in the photos.


I was trying to show the pages together, but the editor is doing weird things again. the picture before it is pulled in looks horizontal, but when it inserts it it goes vertical and I haven't figured out how to rotate it in this program. So sorry about the sideways view.

So I hope it gives you an idea for a simple, but clean page. Have a great day today.

Sunday, April 18, 2010

scrapbooking vacation

I actually had time to do some scrapbooking for myself not too long ago. I don't get a lot of time to do that so it was a treat to be able to do that for a change. I took time to scrapbook a trip from awhile back. I chose to use black and turquoise as my two main colors. It's hard to see but I stamped a swirl in each of the corners using the Baroque motifs stamp set. I used the new butterfly embosslit to make all the butterflies. I show both pages separate and then together. I enjoyed the colors in these pages. They were a simple design but if I want to get much done I need to keep things simple.
So I hope you enjoy my share today. I know I had fun making it. Have a great day today.

Thursday, April 15, 2010

Scrapbooking your faith - love


These are the pages we did for our scrapbooking your faith class. Sorry I'm a couple months behind posting. I just realized that. This is the one we did the end of February. Yes I know it's retired paper, but this is not a class that I'm trying to make money on. It's put together to help us scrapbook more about ourselves and our faith. Something I tend to do little of with all the birthdays and special events that we have. I so need to do so much more of that and this class helps me do that. It also allows me to have bible study with my friends and grow stronger as a Christian as we learn and share together.
These pages would also look pretty I believe with the designer series paper located in the current mini. It's full of pinks and reds and it glitters. What's neat about the paper that's on these pages is that it's flocked and was in the Holiday mini. I had hoped to use it before it retired, but I did get to show it off during that time. I just thought it went really well with pages on love and couldn't help but use it. Even though the pages are retired, I hope the pages give you ideas that you can use in your albums.

I liked the way these pages turned out as I thought they could be used in a myriad of ways. We could focus them on people we love or a specific person, about our relationship with God and how he loves us and we him or even how you share love with others - mission, working with kids, youth, etc. You could also scrap gifts/talents he has given you that you love and how you use them or even what your favorite love languages you have are and how you share them. I could keep going on with ideas.

We started out our lesson by defining love and looked at various scriptures that did that (i.e. 1 Corinthians 13). We also talked about how love is an action - an act of doing. How when we have a growing faith and hope (positive outlook) it is so much easier to share and spread love. We also talked about various bible characters that we had been discussing lately and how they shared and showed love. How much God loves us - enough to give us his son. We also talked about if we share our gifts (talents) with love how much more we can do there. We just have to be open to the opportunities God gives us and realize that if it is his will he will provide all the resources we need to teach others about his love.
So I hope you enjoy my pages and the really short synopsis of the study. We spend about an hour in the bible study part, so that was definitely the quick version. As always if you have any questions, just ask.

Wednesday, April 14, 2010

kids scrapbook class

I'm having a scrapbook class on May 2nd (Sunday) at 2:00. We'll make 20 pages 6x6 size. I'm charging $17 for this class. It's for a child/adult to come and do together or an adult can come and make it for a child as a gift. I need rsvp's by Friday if you are interested in this class.
The class time onsite includes everything you need to make these except for adhesive and kid friendly scissors.


Part 2 of the class is an additional $7 and includes page protectors and a covering (as shown) that you also make in class. So if you'd like part 2 too then the total would be $24 for both parts. When you rsvp I'll need to know which parts you'd like to do (i.e. part one or part two). I'll assume if you say part two that you mean both parts.

A lot of these page ideas came from demonstrator marlise Klein. I changed up a few to match more of my customers tastes, but the general ideas and many of the pages originally came from her. She was generous enough to share these ideas with demonstrators on our stampin connection a great new site that SU set up for us demonstrators to share ideas.
This could also be made up as a class to go, but I'd have to share what other items you would need to complete it on your own. For that type of class I haven't included shipping either - that would be extra.
If you have any questions just ask.

Monday, April 12, 2010

friends card in 2 more colors

This is the same card I showed you yesterday, but in 2 more colors. Like I said earlier it was a design I cased from demo Angie Kennedy Juda. I liked it so much I wanted to try different colors.

These are in melon mamba and bashful blue. To me it's a very versatile design. You can pick your friend's favorite color and make them a card. Since I made several color schemes I thought I would share them.
These are made with the Vintage Vogue set, which I love and is also suppose to be in the new catalog.

So I hope you like them and enjoy seeing some alternatives.
Hope you have a great day today.

Sunday, April 11, 2010

friends card in 2 colors

This is a CASE of demonstrator Angie Kennedy Juda's card (the green one). We did this card during our last club. I really like the vintage Vogue stamp set and I thought it was a card that had an antique feel to it. So I modeled the green one after her card. I also decided to try some other color combinations, one of which is below. I have a couple more I might share tomorrow. The first one is old olive and chocolate and of course the friends part is stamped in chocolate on vanilla. Now my friends in club got a kick out of this card, because I slightly sped up my words and said, "stamp your friends in chocolate". Next thing I know they are trying to stamp each other. They were a hoot that night.
So if they stamped their paper, their card looked like the top one.

The main difference between the top and bottom one is one the color - the bottom is pretty in pink and the ribbon - the top one has satin ribbon. Isn't it pretty? I think it makes it look more elegant then the grosgrain. Both are pretty though, but on this card I think I like the satin. I didn't have it when I stamped the other cards, so I wanted to point out the difference on this post.
I'm also sorry to have left you hanging for so long. We ended up going out of town, somewhat last minute and I was having some internet issues there and then we've been enjoying our last day or so of freedom before school starts back tomorrow. Hopefully I'll be better this week. So I hope you enjoy the post. Have a great day.

Friday, April 2, 2010

sheep card

Here is a little sheep card I made. It opens up like the big chick card did. You could also use it as an embellishment on a scrap page too. It could be just single layered or you could make it like the card and have hidden journaling. It's made using the Big Shot and several punches. You could also make a smaller version with just punches too (which I did, but forgot to take a picture.) I used white and Basic gray paper. I used the large and small ovals, word window and scalloped oval along with the large scallop Big Shot die. The eyes are the white gel pen. On my smaller one I inked all my edges with the gray and it gave it more dimension, which I liked better and would add again next time. So I hope you enjoy my little sheep. Also, so you know I didn't design the sheep, but I'm not sure who I saw it from first or who designed it as several demos have made similar items. Another thing I saw recently that demos have done with this type of sheep is they put the white parts through the Big Shot again and give it texture and then lightly ink it so it looks more 3dish and adds texture. Hope that gives you some ideas. Have a great day today.