I hope you enjoyed the card today. I thought it was somewhat clean and simple, but also very nice for the occasion.
Showing posts with label cards. Show all posts
Sunday, July 31, 2011
thoughts and prayer sympathy
I hope you enjoyed the card today. I thought it was somewhat clean and simple, but also very nice for the occasion.
Tuesday, June 28, 2011
toddler birthday card
I saw how to make this giraffe on our Stampin' Connection site that demonstrators have access to. I first saw this giraffe on a card made by Maureen Albert. Her card was different, but I just thought it was the cutest thing. I like punch art in general, but I thought this one was especially fun because our gift included lots of animals, including zoo animals.
This little card is basically lots of punches. I used mainly current ones but I did use at least one retired one. I used the five petal flower for the ears. The owl punch for the eyes, nose and top of the little things on his head. I used the slot punch (retired) for the little things on his head too. You could cut little strips instead. I used 1 3/8" circle and scallop circle punches. The large and small oval and the 1/2" and 3/4" circles. I inked the edges in the respective colors and the head is actually popped up with dimensionals. I stamped the saying from Teeny Tiny wishes and added some 1/8" espresso ribbon. Except for trying to figure out the right sizes to put where it was really an easy and fun card to make I think.
So I hope you enjoy my share today.
Have a great day.
Lisa
Wednesday, June 22, 2011
second fathers day card.
They are good and creative kids for the most part, but they are definitely busy. I just couldn't resist making this card like this because of that.
I do only have one raccoon stamp and yes its nose faces left, which would be the one on the right side. So how did I get the other one? Well you can't tell in this picture, but I cheated. I stamped the raccoon on a piece of transparency and cut him out and flipped him over. I tried to put the glue under the darker parts of him, but you can still see a little near the bottom. So that's how I cheated. I did watercolor the bear with my blender pen and ink pads. The star is stamped on daffodil paper and then cut out.
So I hope you like my idea. It too could be used for other events - camping, birthday etc. Hopefully it inspires you to come up with some other creative options when things don't work exactly like you want them too. Have a great day.
the open sea fathers day card
I used it for one of my 2 father's days cards. Even though I made a Father's day card, it could also make a cool birthday card or thinking of you, miss you etc. The saying could be interchanged.
For this card I aged the log sheet with my soft suede ink and my spiral punch, which I'm really sad to see this punch retire. Stampin' Up! is the only company that I have personally seen that type of punch in and it was one of my first favorite punches for the style. It was different and I liked that.
I stamped the boat on Whisper white and then colored it in using my blender pen and my ink pads. I also added some cherry seam binding which I love and am glad they are continuing. I got the saying from Teeny Tiny wishes. It's hard to see in this picture, but the Baja is also Versa Marked with both the anchor and the other directional symbol in the set.
Overall a nice and manly type of card, which I have to say is hard for me. I do prefer flowers and butterflies. I hope you enjoy this card idea today. Have a great day.
Tuesday, May 31, 2011
masculine guitar birthday card
Guitar hero. I thought this stamp and card idea was great for the person it was made for. It's hard to see the detail of this card, but it is shiny and sparkles some. The lighting wasn't very good the night that I took the picture. Sorry I don't have a better picture. The guitarist is actually cut out and popped up with dimensionals. I used the edges of the dimensionals to pop up the smaller areas. I hate to waste stuff, so I use even the smallest of scraps when I can.
It is stamped twice. That way I didn't have to cut out the cords and small details, just the main character. It also gave it more of a 3d type of effect which was cool. The star is also popped up as well as the saying. I used the seam binding ribbon and the Word Window and Modern label punches. The background is just the brayer bounced around with various colors.
It's somewhat a basic card, but it fit the need and they enjoyed the card.
The inside has stars popped up on it too as well as another saying. Sorry I forgot to photograph the inside. I hope it gives you an idea for a masculine card next time you need one. Hope you have a great day today.
Saturday, May 21, 2011
wedding shower card
One of our friends had a shower recently and this is the card I made her. It was at a busy time, so I wanted a simple but elegant card.
I used the Elegant lines embossing folder and embossed some whisper white paper. I then took a dauber and my frost white shimmer paint and daubed all the raised areas which created a shimmer effect on the raised area (if you look really close you can see it). I then tied some organza ribbon around it creating a tone on tone look. I wanted a little pop, so I punched a scallop oval out of Basic black. I then stamped Congratulations with my black and then punched it out with the large oval punch. I raised the saying up with Dimensionals for added pop.
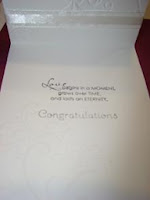
On the inside I added a saying and Congratulations in the same basic black. The cool thing with the clear mount is that I put both of these on my block at once, lined them up and stamped. Pretty cool. I decided I needed a little something else so I took the large flower from the wedding sweet set and stamped it subtly in the lower left corner. If you look really close you can see it. Sorry it was the best picture I could get at the time. It is there though. I think it's fun to add little touches to the inside or the envelopes to make the cards even more special.
Hope you enjoy my share today. Blessings. Lisa
Wednesday, May 18, 2011
mothers day card and new mini set
Sorry its been so long. Life just gets somewhat crazy at times. I haven't had as much time to create lately, but have created items for my classes and when I need items. Just need to pick out time to document them and download them all. We have had a busy few weeks being active in several things. We've had church activities, after school activities, field hockey, etc. Seems like some days we meet ourselves coming and going. I'm sure some of you can relate. I'm hoping summer brings somewhat a reprieve although, it's starting to look somewhat busy already. So I've made a few cards outside of my class time cards and this is one of them. This was my Mother's Day card for my mother. This new set is in the new mini that's out. It's called Fabulous Florets and I just love this set. I've already used it in several colors even. This one uses Rose Red and Pretty in Pink (I hope you can see the stamped flowers). I added some Pear seam binding that is being rolled over and can still be purchased. I did cut out layers of the flower. I basically stamped it 3 times, cut out each one making it smaller each time. I added dimensionals between the layers to give it a pop. Made it look really pretty and 3 dimensional. It was overall an easy card, but thought it made for a pretty Mother's day card. Even though that holiday is over, I think it would still be pretty for birthday, showers, thinking of you, etc type of cards. You wouldn't even have to add the layers, I just did that to mine just because I wanted too.
I've also been working on a digital album idea too that I hope to have done soon. There is a sale going on in May for printing those. So I've been spending extra time doing that too. I'll have to remember to post some pages when I'm done with it. It's all about a trip we took in April to South Carolina with Boyscouts. So anyways, I hope you enjoy my card today and I hope you continue to create. Blessings. Lisa
Saturday, March 5, 2011
Eastern blossoms birthday
I used Pretty in pink and rose to color in the flowers and pear and olive for the leaves. I stamped the saying and punched it out too and the ribbon is our new Rose Red seam binding. I love having different colors of ribbons that match.
I hope you enjoy my little share today.
I know I've been a slacker a lot lately and I apologize. We have so much going on right now and I don't see it getting better soon. I'll try and post as often as I can. I'm still creating when I can and have various class items to post. I just have to get time to post them. :)
Hope you have a great day today.
Thursday, February 3, 2011
more valentine club projects
So I hope they give you some ideas for some more valentine cards. Hope you have a really great day today.
Friday, January 14, 2011
birthday cakes card
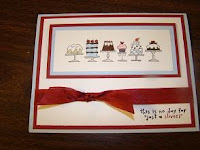
It was a fun card to make. I had to decide what colors to color the various cakes. It's kind of fun deciding do I want a chocolate cake with strawberry icing or vanilla, etc. :) It can make you hungry for sure and it definitely wasn't a "day for just a sliver". :)
I used the cherry cobbler seam binding as the ribbon. I think Cherry is probably my favorite new color and I used it for a lot of items around the holidays.
Also SU doesn't have a light gray marker anymore, so I used Sahara Sand to color the platters. So I hope you enjoy my creation. Hostess sets aren't hard to get and with Sale-a-bration around the corner, it's a great time to plan a workshop or become a demonstrator. Let me know if you are interested.
Hope you have a great day.
Sunday, December 26, 2010
Thank you card - Christmas
I really appreciate all the support my club members give. They come every month excited to create new things and it makes it fun sharing items with them. So I gave them a
The top one or this other one, which is the same snowflake embossing folder, just with a different color scheme. This one I inked it up using some bashful blue. I then punched a couple snowflakes and added on the same thanks with dimensionals. I then added a couple of jewels and some navy satin ribbon to round it all out. I liked them and I had fun making them. I hope they enjoy them too.
Saturday, December 25, 2010
Christmas card - mds
This was one of the new size cards. There are several options on the MDS program and you can chose which direction you'd like and I chose this one. Since I wasn't sure how the printing on the back would come out I had a little more blank space then I needed to have, but it's okay. I know now an
I chose some of our more fun pictures for the back. It was so hard to get pictures of our kids this year. I think we took about 20 just to get the 3 on the front. They kept making faces or laughing or poking on each other. If you have a sibling, I'm sure you know what I'm talking about.
So anyways, I wanted to share my card with you guys.
I hope you have a great day and an awesome Merry Christmas.
Labels:
cards,
christmas,
christmas cards,
my digital studio
Wednesday, September 15, 2010
Just believe club project
Basically we stamped the flowers with black stazon on Whisper White paper. We then took Daffodil Delight, Pumpkin Pie, Bashful blue, Not Quite Navy and Night of Navy to apply shading to the card. We also used markers and colored in the saying (Pumpkin and Navy) and then punched with the 1 3/4" circle. The Pumpkin circle was cut using the Big Shot and the circle die.
The ribbon is our fun new 1/8" taffeta ribbon in Daffodil Delight. It was a pretty quick card even with all the shading. I hope you enjoy the card today and I hope this reminds you to take time to enjoy some of God's beautiful gifts he gives us.
Blessings.
Saturday, August 28, 2010
workshop project - elements of style
They got the choice of making one of these cards or a small 6x6 scrapbook page, which I will show below.
For this version of the card I inked up the large flower with stazon and stamped it over the large and small butterfly. I then took the ink pads and a blender pen and we colored the small butterfly using Rich Razzle
I got the original idea of making this from a fellow demo named Dawn Olchefske. I changed some colors and added some items, but got the original idea from her.
So I hope you enjoy my share today.
Have a great day.
Tuesday, August 24, 2010
door prize notes
I wanted to share a little note card I made. Actually I made up several of these and packaged them up for a door prize at my last workshop. I think they make adorable little cards. With this color combination, I think they also make a great little teacher gift too. I may have to make up a set of these for some of the kids teachers. Good teachers really put in a lot of time and energy and I think they deserve little thank yous along the way. I'm hoping I'll get some extra time soon to make some as my children have some really nice teachers.
I took these cards and added an envelope (also stamped with the apple) and put it into a cello bag and made a bag topper to match. I'm sorry I didn't get a picture with it all packaged up. I was in a hurry and did manage to make an extra card, but had to hurry to get the packaging done. But I basically used the same colors and theme for the bag topper.
It's hard to tell in this picture, but the circles in the background are stamped with daffodil. The rest of the colors are Real Red, Old Olive and Basic Black. The set is a level 2 hostess set called Apple Blossoms. Something to earn with a qualifying workshop. If you are interested in hosting a workshop let me know and we can set one up.
So I hope you enjoy my little note today. Have a really great day today. Don't forget to take some time to say thanks to someone or send them an encouraging note. It only takes seconds, but can mean a lot.
Saturday, August 21, 2010
tropical note happy birthday
So between that, work, church, and a special training that Stampin' Up! is providing for us I haven't had much free time lately. So probably until the season is over and the training from Stampin' Up! is over I won't get to post as often. Hopefully you will still visit from time to time to see what is here and it will help inspire you to create, which is the best part of it all. :)
For this project - I created a small Tropical Party 3 x 3 notecard for a make and take. I thought it ended up being a fun little birthday note to add to a gift or a package. I can even imagine a gift bag stamped with the same set. Maybe I need to stamp one of those soon.
I really like this set for summer pictures. When you stamp it with some fresh fun summer colors you can get some pretty designs.
This set is only available through the end of the month though, so if you'd like to get it now is the time to get it.
The saying is from Teeny Tiny Wishes and can really be switched out for several different sayings even as they are all about that size give or take a little.
I like these little cards. They are good for gifts or a thank you even. Just something small to say hey I'm thinking of you. We sell envelopes to go with them too, so you can stamp them to match as well. I have another one I did recently too which I packaged up into a set. I'll have to show you that little card next.
So I hope you enjoy my small share today.
Hope you have a great day.
Saturday, August 7, 2010
butterfly builder roller birthday card
This was another card that we did for our last club night. We used the new builder wheels with the jumbo roller. I left out the middle wheel so we could use the new satin Razzleberry ribbon in the center. It's so pretty and adds a nice shine to the card and the space looks really good with that width of ribbon. I rolled the wheels with Old Olive ink. I used the Punched Posies hostess set for the butterflies. If you don't have this one, then Butterfly Prints in the main catalog is really close. For these butterflies. We used Rich Razzleberry and Concord Crush to ink the butterflies using the Rock and Roll technique. The middle one is popped up with dimensionals to give some dimension to the card. :) I just thought this was a fun and pretty easy card for a birthday. You basically just roll it, tie on ribbon, stamp and punch 3 butterflies and your done.
Like I've said lately, I really like easy as the schedule has been a little crazy and will be even more so when school starts.
So I hope you enjoy today's share.
Thanks for looking and have a great day.
Wednesday, August 4, 2010
owl 3x3 for you card
This was a little card I made for them last time they came. It uses our new owl punch. I also used our bird punch (for the leaves) and I also used the Big Shot to texture his little belly area using the textured embossing folder to do that.
I also used the saying from Teeny Tiny wishes which is a great versatile set with lots of different sayings. It's one of my favorites since there are so many to chose from.
This punch is kind of fun to work with. I've also seen several other things made out of it that I'll have to try soon. I mean if you look at the base of it what can you make out? hhmmm? I see a flower, an animal head (without the feet) and possibly some other items too. I'll have to play around with it some more, so I can share some of the different items it makes. If you see something in it you'll have to share what you come up with too. That's one of the fun parts - being creative and sharing together. With our new Stampin' Connections website that demos can access there are thousands of ideas out there. I love being able to access that and getting to see and get all the new stuff first. It becomes almost like Christmas...too fun.
So anyways, I hope you enjoy my little note card. I also hope you have a great day tomorrow and are able to stay cool. Blessings.
Sunday, August 1, 2010
elegant lines birthday
I just love the embossing folders. They give such deep rich embossing and look so pretty.
I then stamped the birthday sentiment from the Perfect Punches set in Marina mist. Punched it out with my wide oval punch. It's so much fun when sets coordinate with punches. I can't resist those types of set. :)
I then tied on some vanilla satin ribbon and tied in a little bit of 1/8" marina mist taffeta ribbon for the knot. I then added some of our new self adhesive pearls to the little circles that were embossed and that just gave it the last right touch I thought. I didn't come up with the pearl idea, but have seen it on several cards lately along with jewel brads, crystals and various items like that. I don't know who originated the idea, but I like it. For this card though I thought the pearls especially matched the paper and silky look of the satin ribbon perfectly.
So I hope you enjoy the share for the day.
Keep creating and have a great day.
Monday, July 19, 2010
Because I care in black, white and Marina
I do think it's pretty versatile and it includes sayings too, which is great in my opinion.
I know I like to
It sits on top of the new marina mist 1/8" taffeta ribbon. It is very pretty. I'm including a close up picture so you can see it in better detail. Some of the new colors have some very pretty ribbons and this new thin ribbon is no exception.
I bet this new ribbon will be great for the holidays too. It is just small enough. I can see ornaments tied with it and craft projects, and little gifts, etc. I know I'll have to get more of this real soon.
So I hope you have a great day and enjoy my share. Blessings.
Subscribe to:
Posts (Atom)