Tuesday, December 30, 2008

Love you Much Bundle

Love you much Bundle is now on sale.
From now until January 31st you can buy this cool bundle. It features brand new Candy Lane Designer paper, the Love you Much stamp set and the new Heart to Heart punch (punches 3 hearts at once).
Click on the picture to get more details at my site.

Note: When the new catalog comes out on January 18th all these items will be in there, but you won't get the discount unless you buy it in the bundle and this discount is only good through January 31st.
Let me know if you are interested. (note: this currently can not be bought online. It's popular and the paper is on back order, so it has to be bought through me until the backorder issue is resolved. Sorry about the temporary inconvenience).


Description Retail Value

Love You Much stamp set

$25.95

Candy Lane Designer Series paper (Close to Cocoa, Pink Pirouette, Riding Hood Red, Very Vanilla)

$9.95

Heart To Heart punch

$15.95

Bundle Retail Value

$51.85

Love You Much Bundle (20% off; item 115405)

$41.48

I Wish Scrap class

I'm offering a Christmas scrap class using the I Wish Scrap Kit. It will be held on Feb 1st (Sunday) from 2-5. This gives you time to print out your pictures. :)
Deadline for signing up will be January 4th. I'm worried this will retire (since it's seasonal) so the sooner I can place the order the better. If this item sells out before the 4th it will have to be canceled, but for now I'm scheduling it. I'm hoping by getting it in before the 5th I'll beat the rush when the retiring accessories list comes out on Jan. 5th.

The cost is $32. You'll make 4- 2 page layouts (8 pages total). You'll get everything you need to make those 8 pages (except adhesive). You'll also get the rest of the scrap kit to take home with you to make more stuff with. When I made mine, I had 3 dsps, some cardstock and lots of the cardstock stickers left over. So you'll have plenty left over to add to more pages, cards, tags, etc or add more items to the pages I'll be showing you. Scrapbooking is all about you, so it's also fun to modify as needed.
So let me know if you are interested.

Here are some of the pages. Sorry the pictures are dark. I don't get home till dark, so it's the best I have at the moment. If you'd like to see a brighter picture let me know and I'll try and take it to work with me and try it there. The colors are Real Red (a bright red), Old Olive, whisper white and Chocolate Chip, so it's much brighter in person. These are 4 of the pages we will be making.
The top one on the left can hold up to 3 4x6 pictures. I made all the pages to hold either 4x6 or 5x7 so there is little modifying of your pictures. When you are done, you can just add pictures or journaling and you are done. Pretty easy that way. So let me know by the 4th if you are interested. Thanks

Tuesday, December 23, 2008

Merry Christmas from our house to yours

I want to spend some time with my family the next couple of days and I wanted to show this card before I did. I thought it was appropriate. It uses the To You and Yours stamp set, so I thought it was appropriate to wish you all Merry Christmas from our house to yours.

It shows a faux metal technique I I learned from the SU training team (One of the perks of being a demo by the way). There are two ways to do Faux Metal and this is just one of them. How do you do this you ask? First I took the stamp I wanted to use and inked it with Versa mark and left it to work on the next part (don't stamp anything - you need it wet with Versa). I then took a piece of silver paper (cut to a little bigger then the size so you can hold it) and inked it with Versa mark all over (use the pad). Then poured silver embossing powder on it and embossed the whole piece. I then did that same thing two more times on the same piece, so it's basically been embossed 3 times all over. I hold the heat gun on the piece a little longer and then I grab my stamp and I lift my heat gun up and then stamp into the warmed embossed piece of paper. When I lift my stamp off it looks like the stamp image has been etched into the embossed layers. The Versa mark keeps the silver from sticking to the stamp, so it's a pretty quick and easy way to add accents to your cards or scrap pages. A fun way to save a little on decorations and probably a little more archival then pure metal pieces. Anyways, I thought it a fun technique to show you and also to help wish you a very Merry Christmas!

We hope you take time and actually enjoy the holidays. Sometimes we spend so much time preparing we forget to enjoy the gifts we do have (like Martha did). So take some time and enjoy your family, your friends, your life and most of all God, who gaves us everything. God bless and Merry Christmas.

Here is what I used to make this card.
Paper: night of navy, bashful blue and whisper white, Brushed silver
ink: versa Mark, night of navy
stamps: To you and yours
accessories: silver cording, heat gun, silver embossing powder, white grosgrain ribbon, ticket corner punch, wide oval punch, dimensionals,

Packaging for small gift or money

My nephews are at that age where they like money (or gift cards) for birthdays. They like picking out what they want. They are teens and I don't blame them. So at my oldest nephew's birthday back in October, I wrapped up his money in one of our new pillow boxes and tied it with ribbon. He seemed to really like that, because I made him work a little for his money. Normally we would put it into a card. This time he actually had to open something to get to it. :) So when it came to my second nephew's birthday, I tried to figure out a different technique and this is what I came up with. I've seen some other demos do some things similar to this, so I can't take all the credit, but I decided what to decorate it with.
For this little package I used the Top Note die and punched out two of them. I then used the Word Window punch and punched out a handle. I had some small white lunch bag type bags and I cut it down to fit. I then sticky striped the bag to the Top notes, inserted my gift and tied together with ribbon. I did stamp the top note before adhering to the bag. Pretty fun and easy. I also know my ribbon is crooked. I could have tied it on the side or made more of a "fake" bow to make it straight, but I wanted him to have to untie it, so I placed it close to center, making it having to tilt, which also worked out so you could see the Celebrate you better. If you don't have a Big Shot, you could always just decorate the paper with punches or use some decorative scissors or such to create a neat design. Your imagination is the only limit you have, so let it think outside the box and have fun creating. This time of the year it's hard to find time to create, but it can be squeaked in from time to time. ;)

Here is what I used to make this little package:
papers: whisper white, bashful blue
ink: Tangerine tango, bashful blue, night of Navy (some markers too)
stamps: Party Hearty
Accessories: Big Shot, Top Note, Word window punch, 1 3/4" circle punch, 3/4" circle punch, dimensionals, Tangerine Tango striped ribbon

Friday, December 19, 2008

birthday card using elements

I thought I'd take a quick break from Christmas and show you a couple ideas I made for my nephews birthday. We have several birthdays from October on and this was just one of them.
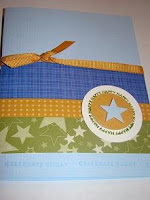
On this card I used the Rock Star Card elements and the Starring you stamp set. This was really quick and easy to put together. If you haven't used the elements they are very easy. If you are new to this kind of thing it is all spelled out for you. It tells you sizes to cut your paper, what other parts you need and even where to line it up. Now you can modify like I did the Christmas ones and I did a little here (bigger circle and words on the bottom). They really are fun and fast. I think these make good guy type cards and could also be used as a graduation card or any type of card that you want to say "Way to go". Everything was pretty much provided. I did stamp using old olive ink and versa mark ink. I punched a 1 3/4" circle too and then used dimensionals to add height to the card. Overall, it was fun and cool. Now if we could get it to play music too, that would be even more fun since that is the hit in our family right now.

Tuesday, December 16, 2008

handmade holiday kit with snowflakes

These are more minor changes to the handmade holiday card kits. The red and green use the heat and stick powder and dazzling diamond glitter. It's hard to tell here, but they really sparkle in real life. The kraft one just uses white craft ink and is of course more muted. All I added to the kraft one was the snowflakes (from Snow Swirled) and the whisper white ribbon. Season Greetings is stamped using the To you and yours stamp set, which coordinates with the kit, in mellow moss ink.

This red one has white ink with heat and stick powder and dazzling diamonds and topped off with silver cording. The sentiment (Merry & Bright) is from the To you and yours set and is stamped with mellow moss under the house ( a little hard to see in the pic).


The mellow moss one is like the red one, except I added the mellow moss grosgrain ribbon. I also stamped the sentiment using To you and yours stamp set with chocolate chip and ruby red markers. In case you didn't know Ruby Red is really close to Riding hood red. For small areas it's hard to tell the difference, so that's an option if you like the markers.


So these are easy examples, so get playing with some of your sets. Take a break from all the stress of the holidays and enjoy a small break and have some fun. It is really fun playing from time to time. You ought to try it. :)

Free shipping

If you haven't heard, SU is offering free shipping on orders over $70 or more. This is an individual order as well as, a group order. So if there is something you've been dying to get, now is the time to get it. Right off the bat you save 10%. Also, there is a 10% off all the retiring sets in the catalog. Both are these are effective until Dec. 23rd, so act now if you are interested to get these cool deals. You can order from me or my website - http://detailmama.stampinup.net.

Handmade holiday kit

I had gotten the Handmade holiday kit and did enjoy the simplistic look of them put I wanted to see if I could make some minor changes and make them even better, so here are a few of my examples. I have a few more, but these are the first ones. It's interesting seeing what a couple minor changes bring.
This first one all I did was stamp Lovely as a Tree on the craft with Mellow moss ink.


This second one all I did was add some mellow moss ribbon and turn the angle around to an upright card.


This last one I changed out the paper for the striped ribbon and added a 1 3/4" riding hood red circle and some dimensionals. Pretty quick and easy, which I'm all for this time of year. Now to decide who gets them. lol. I think the hardest part of making crafts sometimes is parting with your stuff. hmm... Do you have that problem too? Anyways, I hope this helps you see how just some minor adjustments can make a difference.
Hope you have an awesome day.

Monday, December 15, 2008

Sparkly ornaments

Okay, I've been talking about the ornaments I've been making that were sparkly - well here they are. I didn't want to show them until I got most of the colors done. They turned out really pretty don't you think? The weren't that hard to make, just a little messy is all. These are clear ball ornaments, which have been colored with re-inker and dazzling diamond glitter. I only could make so manydifferent ones, because it's all the colors I had. There are 48 colors out there, plus the In-colors so there are a lot of options.

So how do you make them you ask. Well for the bigger ones you add about 30 drops of reinker (you can try less if you want, you can always add more.) I used classic ink by the way. I tried the white craft ink and it was thick and didn't move much. I added a touch of water, but it thinned a little too much, so I poured out some and then added some regular reinker to it and it kind of made a marbelish type of color which was sort of cool. It did take more patience though. So after you add the reinker you slowly revolve the ornament around and get a good even coating around the whole ball. Don't shake the ornament at this step or the reinker it causes air bubbles which are a pain to get out. When you get to the lip I suggest holding over a plastic cup or something you can throw away that holds liquid to let it drain some. I then dabbed it some with a paper towel while holding it upside down to get any excess at the lip (it will go through the towel, so don't set it on anything important - don't ask how I know that :) ). Then you immediately pour in some dazzling diamond glitter in. You can use a small funnel or I had a small spoon and a cheap Glad type container which I store mine in (or powder tray works) and poured in what I could. You need enough to coat it but not too much, because depending on the color you use it will color the glitter, so it's not as reusable. You can always add some more if you need to until it's dry. By the way, I used gloves and I would recommend you do that if you don't want colored fingers. Once the glitter is in there, take a cloth - paper towel works and cover the hole and shake really well in all directions. (If you don't use a paper towel or gloves, glitter will fly so I've heard). Then empty out any glitter that's extra (I don't recommend putting it back in the original container - unless you want different colored dazzling diamonds) and then let dry. Pop the top back in and you are done. To start with I'd use a lighter color that you can see through - it makes it easier to move around that way at least until you get use to it. The colors in the close up balls are real red, pacific point and old olive. I hope you enjoy this. If you have any questions just ask. My daughter also helped me make little ones for her teachers and she enjoyed it too. We put in about 11 drops for those. So have fun experimenting. I didn't try different colors, but that might be cool too - a swirl type of effect. Hmmm, sounds like an interesting prospect to try. Maybe one day soon. Anyways, I hope you have a great day.

Saturday, December 13, 2008


Advent box
I picked up this little box and thought it was really fun looking. I decorated it with the ski slope dsp. I thought it looked really fun with all the colors. I covered the back and sides in the green paper and inked the edges. I then wrapped around the chocolate chip originals ribbon. The numbers are stickers that came with the box. My kids are loving opening each day. They think it's cool.

Thursday, December 11, 2008

circle ornament?

Hey everyone,
It's been pretty busy around here getting ready for the holidays. I haven't had much time to play it seems. I did finish a couple of projects that I am using as gifts that I need to mail out soon. Most of them you have seen if you have come to my classes - calendars and such. I need to make some more gift card holders still and I am still getting ready for my club on Monday. I have 3 different projects to make, so I hope they enjoy them. I'll share those next week.
We've been busy trying to get ready for the extra Christmas stuff. We just got our tree up and decorated last night and have repaired it at least 3 times - the cats see it as a new challenge. Hopefully it will be old news in a couple of days and they will leave it alone. :) We got our angel tree items in too, which is a relief. I had my DD help me with the shopping this time. She seemed to like that. We have a weekend full of activities and our first taste of Christmas as we get together with my husband's parents to celebrate early. I have had a little time to play between all that. I got to make this ornament, more sparkly ornaments, which I'll show soon, a countdown to Christmas box and a set of cards made with the simply sent Christmas card elements and the To You and Yours stamp set. I'll show them in the next few days as well.
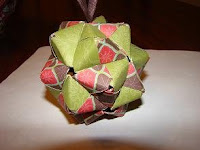
Anyways, back to this ornament. This is a circle globe ornament, kind of like the big ball with less circles. I used 10 here instead of 20. The difference is I turned the flaps inward and not out. I'm now wondering what 20 would look like. This turned out pretty cool I think and they come out into different shapes. The last one was long and pointy this one is 5 sided and more flatter (looks the same on both sides). I used the Frosty Days DSP and my Big Shot and circle ornament die to make this. I also used the small hole punch and silver cording to put a hanger on it. It's all held together with SU glue stick. You ought to try some they are fun. I hope you all are having a great day. Try not to stress too much getting ready for the holidays. Remember one step, one day at a time - and don't forget to breathe.

Tuesday, December 9, 2008

Retirement list and free shipping with qualifying order


SU just released this catalog's retirement list. From now till December 23rd, you can get 10% off all retiring sets. After that they will go back to full price until they officially retire mid January.
Click on the picture to take you to my website to see pictures and different versions of the list (i.e. alphabetical or numerical).

The other cool thing is that if you order between now and December 23rd, you also get free shipping on orders over $70. So that means workshop orders too. If you or you and a few friends want to get together and order some stuff between now and Christmas your shipping is free if your order qualifies. See me for details or go to my website - http://detailmama.stampinup.net. Just sign in and select me as your demo and you'll get the best price options and if you qualify - hostess benefits.

Saturday, December 6, 2008

Different ornaments

Here are some different ornaments I made. They took a lot more time then I expected, but thought I'd share.
This first one was an idea I saw from another demo. She had used wrapping paper, which I think would work better because it's thinner. I think that makes the gaps less. This took me forever to figure out. I told my sister I need an engineer to help. lol.
I did finally get it, but I had to sleep and try again. It was a challenge though which I love. It did come out cool though. For it I used some of my leftover Holiday treasures paper and chocolate grosgrain. Since it took so much time I had to show it.


This next ornament I made with my Big shot snowflake die. I cut out a bunch and glue dotted them together to make this 3d ornament. Fairly easy, except trying to decide how many I needed to complete it. I think it has something like 14 snowflakes in it. I also used baja blue paper and silver cording.


This next ornament is a different spin on the ball ornaments. Instead of putting the lips of the round ornament together I folded them in. On this ornament I put 8 together which gave it sort of diamond type of appearance. I haven't tried 20. I wonder what that would look like. hmm... I may need to try that. I also saw one recently with one lip in and one out. I may have to try that too. I hope you all aren't getting tired of ornaments. lol. These are circles from the ornament kit in the mini, but you can use any colors with the big Shot and circle ornament die.
Well this is most of the paper ornaments - or at least the better ones, that we have made. I hope you got inspired to make some too. There is one more type, but it's not paper and it's super shiny hope you like glitter. you'll have to come back soon and see those. I'm really loving those and I am trying different colors, thus why I haven't shown them yet. Hope to hear from you soon. Have a great day.

Friday, December 5, 2008

ornments similar to mini

Here are ornaments that were similar to the ones in the mini, except I used the ski slope dsp paper found in the mini. Aren't these pretty. We made these at my sisters. I had already made the mini ones, so we needed new ones, so we did these to have different ones.
The strip ornament is 8 - 1x6" strips braded together.
The circle one is made with 20 circles scored (I used the Big Shot die - so easy). I think this paper made some really pretty decorations. I also decorated a countdown box with the same paper and it's pretty too. I'll try and remember to take a picture of that soon. My kids are loving that.
So are you getting into a Christmas mood yet. I can't wait to get our tree. We are hoping to get it next week. I love the smell of a fresh tree and love decorating it and pulling out all the ornaments we've made through the years and seeing all the memories. So much fun.

Remember if you'd like to order items from SU for Christmas do so quickly to get it in time. Several items are already on back order, so it's best to decide soon. Also the new retirement list comes out Dec. 9th for those of you who like to see that, keep an eye out.

Thursday, December 4, 2008

This first little ornament isn't very elaborate, but my son loved it. He grabbed it so many times he bent the corner of the star a little bit. This ornament will actually hold a small present or candy, etc. It has a flap that folds in and will keep it closed. The star is just 3 large star punches glued together at the tips. The ribbon is sticky stripped to the inside of the box. It's just stamped with the snowflake from Winter post stamp set and then decorated with red flowers punched from with the Boho Blossoms punch. It isn't the fanciest, but it's how my son liked it, which is all that matters. I used Old Olive, summer sun and real red paper; real red ribbon and sticky strip.


This next little tree I've seen done on a flat card. It's an orgami folded tree. I thought it might look cute as an ornament, so I made two of them and stuck them back to back with sticky strip. It looks much cuter in real life. It has a 3d effect to it, which can't be seen well in the photo. I used the bella dsp to make it and silver cording for the hanger. In real life it's one of my favorites. I should have taken a picture from the side you might could have caught the 3d effect better. You ought to try it. I think it's fun making new ornaments. Do you have any ideas to share? I'd love to see some.

Tuesday, December 2, 2008

my daughter's ornaments

These are two of the ornaments my daughter put together using the supplies in the ornament kits found in the mini. The only added part was the silver cording and the dimensionals. Aren't these cute? She did a good job decorating them up. What do you think? I'd love to see some ideas you put together.
Hope you are having a great day.

punch ornaments

Over the next several posts you will be shown several ornaments. Hopefully you like ornaments. We got together over the holiday weekend and made several. Even my kids got involved and made some, which I'll show some of them too. We had a lot of fun playing. I hope you are getting into the Christmas spirit. Here are a couple quick and easy ones to inspire you. The pictures don't do them justice, they are really small and very cute ornament additions. The round one is made with the scallop circle punch and they are punched out and folded in half and glued back to back. I used some of my leftover Holiday Treasure paper from my bags and tags class and some silver cording to hang it with, which you can't see here but got eaten off the next night by my cats, so now it's just a nub. Okay, don't laugh. It's funny and sad at the same time. The same thing happened to my little blue one, now we have to pay attention to where the strings go until we get the tree.
This one is made with the scallop square punch. You just fold in all 4 sides (just the corner 3 scallops) and glue the tips together. I punched a hole in the center of one side and fed through the cording before I glued on the final side. I stamped the baja with the Winter Post stamp set before I put it together. Really quick and easy idea and looks good with the dsp.
So I hope you are getting into the ho-ho holiday spirit. lol. Remember to take time and enjoy. Have a great day.

Saturday, November 29, 2008

club card and tags

I was hoping to show you some of the ornaments my sister and I made during our Thanksgiving time together, but I can't find my adapter for my camera. We cleaned up to have Thanksgiving dinner here at our house for my husband's family, so I have to find where my husband put it. As soon as I find it I'll post some. There were some really cool ones made and I can't wait to share, especially the punch ones and the sparkly ones, so check back soon. In the meantime, these are the last couple of objects we did at club. I thought you might want to see them if you weren't involved or remember an idea if you were, especially since this is the time of the year we all get ready for Christmas. So did anyone go shopping this weekend? I did some today too. Don't forget the extravaganza sale if you are interested. Some items are supposedly already sold out. It's good only through Dec. 1st while supplies last. See my post from a couple of days ago if you need updated on what it is. Also the rub-on sale ends Nov. 30th too. When you spend $20 you get 20% off rub-ons. My SU website is open if you need to make an order, just click here.

This first card was fairly simple to make. The saying and ornaments are stamped using the silver encore ink. It takes longer to dry (like pigment), so we heat gunned it to make sure it was dry. Then the ornament tops were punched out of the silver paper which gave it a glimmery look which you can't really see here.
So here is what I used for this card.
paper: old olive, real red, silver, ww
ink: silver encore
stamps: snow swirled and Best Yet (hostess level 1)
accessories: silver cording, 1 3/4" circle punch, designer label punch, cropodile, dimensionals, heat gun.

Since we made the book and the card there was a little bit of a gap time finishing the little book, so while people waited we made these little tags. They were super easy. Just stamped the images, punched the corners and holes and thread the ribbon through.
For these I used the following:
inks: Old olive, bashful blue and night of navy
paper: old olive, night of navy and ww
stamps: To you and yours
accessories: tag corner punch, cropodile, olive and bashful grosgrain ribbon.
Well I hope you have another great day. I have to go get some stuff ready for tomorrow. Some friends are coming for a BYOS get together, which is a "Bring your own stuff" time. Where everyone brings there projects and takes time to work on them together. We enjoy getting together with friends, so it should be fun.
Here is the little booklet that I talked about earlier that we did at our last club meeting. I was taught this idea at convention from SU. I did add images on the inside using several fallish stamp sets (Lovely as a Tree, etc).
I thought it would be cool to add stuff in it that makes you happy (about life, or a person, etc) or things you are thankful for and maybe fill out at Thanksgiving or something. Just something to remind you how blessed you are to have what you have or love someone you do (what a blessing for someone to get something like this telling them why they are important to someone else.) Even a child would love to hear what you like about them or spouse even. When was the last time you shared what your spouse does that makes you happy? It can also be a mini scrapbook, basically it's fairly versatile. Just a few thoughts anyways.
This book can be made two ways. One you can take love notes and fold them together add an envelope in front and one in back and then punch together or you can just take paper and make a booklet. Either way works well. If you use little envelopes you can tuck in the flap and use it as an extra pocket to stick more notes or pictures in.
Here is what I did to make this little booklet. First I scored the left sides about 1/4" so it will open cleanly. I stamped my images and spritzed the cover. I did the coloring using a removal technique, which I'll explain in a moment. I versa marked the inside pages. I then stacked them all up and then I cropodiled my edges and threaded ribbon through and tied in a knot. Lastly I put a drop of crystal effects on some of the flowers and added an orange bead. Pretty easy.
Oh, I almost forgot. How did I use tangerine tango and chocolate chip together to stamp the image? I stamped the image with tangerine tango and then used my blender pen to remove ink on the branches and then used my chocolate chip marker to fill in the lines of color I removed. So that's a way to cheat so to speak since SU doesn't have In-color markers. Hope this helps.


here are the parts I used to make my book.
papers: very vanilla and tangerine tango
ink: Versa mark, Tangerine tango; chocolate chip and really rust markers
stamps: Warm words, Eastern blooms, Lovely as a tree
accessories: old olive grosgrain, cropodile, bone folder, cutter, spritzer, blender pens, crystal effects, orange bead duo.

Thursday, November 27, 2008

Turkey day


I had to share this little turkey. I thought he was really cute. He is made out of punches. This is one SU showed us how to make and he is really cute on this little notecard. I hope he makes you smile today.
The body is 1 3/8" circle punch, a 3/4" circle for his head, two 1/4" circles for buttons, double circle for eyes, 3/4" square (trimmed down for hat), boho flowers for feet and a part of petal for beak. The wings are scallop punches folded. First you fold down 5 of the little humps, then turn it over and fold in half with the flat part at the top (this half line will be a guide). Then open it up with the humps still folded over and then with the humps in the back fold down top corner to center line (kind of like you do for a paper airplane). Do this for both sides. Then it's done and you place behind your turkey. I then adhered the turkey with dimensionals to give it a little dimension.
The colors I used were pumpkin pie, black, riding hood red, kiwi kiss, chocolate chip, more mustard, ww. Thanks for looking and have a great Turkey day!

Happy Thanksgiving


This is an idea I got from another SU Demo (sorry I don't remember the name). This card is one I made for my club members. I thought it was nice but simple to mass produce. We made several items this past meeting. I wanted them to know how thankful I am for them and we also made a book that I'll show soon, that they could use to write items that they were thankful for. I know our family is blessed to have friends and family members that we love. Don't forget to take time this holiday to say thanks to someone you love and tell them how much you love them.
Have a great Thanksgiving day.

Here is what I used to make this card:
paper: kraft, tangerine tango, ski slope dsp
ink: close to cocoa
stamps: Holiday & wishes
accessories: wide oval punch, daubers, olive narrow grosgrain, chocolate chip wide grosgrain, glue dots and dimensionals

Monday, November 24, 2008

Holiday Extravaganza

Update: Click on the flyer on the left to see it bigger.

From December 26th thru Dec 1 SU is holding a Holiday Extravaganza promotion. Starting Wednesday, if you go to my SU website you can order some specials at reduced price. They haven't told us what yet, but it's my understanding that it's bundled items that are discounted, rumor has up to 50% off. Now we know how rumors are and SU is being really hush hush about what's to come, so there is no guarantee there, but there is a lot of chatter and speculation about it all. They have also shared it's while supplies last, so if you really like something get it, because there is no guarantee it will be there a few days later. So if you need some stuff for Christmas, go to my site and see if there is anything you'd like for Christmas. Let me know if you have any questions. I'll do my best to answer them. Have a great day.

Sunday, November 23, 2008

Holy Triptych Christmas ornament

The Christmas bug has already been hitting me. I've done several cards, a few scrapbook pages, a treasure book for holiday memories. I enjoy making fun things for the holidays. How about you? One thing we use to do as kids is make crafts for the holiday, especially ornaments. Besides having fun with the Christmas kits, I've also been experimenting with other techniques as well. This one is done with acetate and Black Staz-on. I colored this in with a blue and yellow sharpie and my white Staz-on. I then added dazzling diamond glitter to the white wing. I added in some iridescent filler to the inside to give it more of a surreal feel to it, but it was really quick and easy. Here is what I used to make this ornament.
Stamps: Holy Triptych
ink: Black & white Staz-on, Sharpie markers (non SU)
paper: acetate
accessories: coluzzle, dazzling diamond glitter, silver cording, cropodile, aqua painter

I hope you get the bug to to have fun and enjoy some holiday craft making too. Have a great day and remember to tell those you love how much you appreciate and love them.

Saturday, November 22, 2008

Scrapbook with Season to Share

These are a couple 6 x 6 pages made with the Season to Share accents and elements. These were quick and easy which I'm liking now. Especially with the holidays coming up, the quicker the better.

Both of these pages were made with Riding Hood red and Kiwi Kiss and some of the cardstock stickers from the Season to Share. When you put them together the green flows continuously across both pages.


Sorry, I haven't updated much lately. With my all the events for my sons birthday and just normal stuff, plus some extra getting ready for holiday stuff (like rehearsals, cleaning, planning, etc) it's been more difficult. No excuse really, but it at least lets you know what's going on. I'm assuming some of you all are experiencing some of the same stuff and know what I mean. Just remember to take time out to spend with God, your family and make some time for you too. It never fails this time of year - we never take time to relax and enjoy what's around us. Take a moment today and do that - and then breathe and then smile. Because after all, when you reflect on it, we are all truly blessed. :)

Tuesday, November 18, 2008

Season to Share part 3

Okay, I hope you all aren't getting sick of the season to share. I just had fun playing with this. I also have scrapbook pages, but I'll share those tomorrow. Then I'll share what I did at club and a box I'd like to show you how to do, but I have to get more pictures taken first. I'm sorry I haven't posted much. It's not even the holidays and I've gotten so busy. My son just turned 5 and he's had like 4 different celebrations already and one more to go (kid party, school, my family, my husband's family, etc). He's one excited, sugared up kid. Not to mention keeping up with all the kids activities, homework and I got to enjoy club this week with some great ladies. I also have a bags, tags and gift card class I'm getting ready for on Saturday so it's been a busy week. Of course many of you deal with the same thing, so you know what I mean. So here are some more fun projects for you to peruse. I hope you enjoy them.
This first card was easy. I wanted it to look like a package, but was also trying to make it flat in case I wanted to mail it, so I just cut strips of paper and used the mono adhesive to glue them together and topped it off with a punched circle and added a tag sticker from the Season to share elements. Really quick and easy. I used Riding hood red and kiwi kiss paper.

I was playing around with package looking cards and this one uses the old olive wide grosgrain ribbon. I just looped a bow in the center and held it together with a small piece of ribbon and glue dots. I then added the two small tags and got a cute present card. Again I used the Riding hood red paper.


This last item is 2 separate tags. I just placed them on red paper so they would show up on my white table. All I did with these is placed the sticker on paper, matted them and then used my ticket corner punch and my tag punch and trimmed the corners. Then used my cropodile and hole punched it and added ribbon. It was done in nothing flat. You ought to try some. They are found in the accessories section of the catalog - called Season to Share. For these tags I used the following: Riding hood red, kiwi kiss, & whisper white paper; the tag and ticket corner punches, cropodile, whisper white ribbon and old olive ribbon. Thanks for looking and have an awesome day

Thursday, November 13, 2008

Season to Share part 2

I'm having fun playing with this element kit. Here are a couple more cards I made using the Season to Share element kit.
For the green card I used the following.
Paper: old olive, riding hood red, white
ink: old olive
stamps: winter post
accessories: season to share


For the red card (kind of like Santa's belly). I used the following:
paper: riding hood red, black
accessories: Season to share and 1/2" circle punch.

These are super easy to make and quick too. You ought to try some. I'll post more soon, so be back soon to look. Let me know what you think.

Wednesday, November 12, 2008

accents and elements part 1 - season to share

One of the new things I have been playing with is from the accents and elements section of the catalog. This set is called Season to Share. It comes with 12 self adhesive sheets, 3 each of 4 designs. You can layer them together to create cards, scrapbook pages tags, and other crafty items. Here are the first 3 I'm posting. I'll post more later, so come back soon to see.
Also one thing about being a demonstrator is that they provide you with ideas. These three ideas were either exact replicas or slightly altered versions that SU shared with us. They were quick and easy. All the words and most of the colored areas are the stickers although some of the circles are not, but were punched with punches, so these can be combined with other products you have on hand too. Really super easy. You ought to try some. It's a little hard to see but the kraft circle has little circles the same color on the inside and the large green circle has paper piercings all the way around.
This first card I used the following:
paper: riding hood red, old olive, kraft, white
ink: black
stamps: Holidays and wishes
Accessories: season to share, 1 3/4, 1 3/8, 1 1/3", 1/2", & 1" circle punches, paper piercer and mat, dimensionals


This second card uses the following:
paper: riding hood red, kraft, white
accessories: season to share elements, on board something seasonal, hemp twine, corner rounder


This last card uses the following items:
Paper: old olive, riding hood red
accessories: season to share, white tafeta ribbon, dimensionals